It is true that you can recover deleted iPhone photos from iTunes or iCloud backup. However, both two iOS data recovery methods have their own limitations. In another word, it is not “safe” enough to get back your deleted or lost iPhone photos.
Thus, this article aims to show you safe and easy ways to recover permanently deleted photos from iPhone X, iPhone 8, iPhone 7, iPhone 6 and more. You can regain your iPhone pictures without overwritten or data loss errors. Wanna know detailed steps to recover deleted photos iPhone easily? Just read and follow.
Part 1: Get Back Your Deleted iPhone Photos from Recently Deleted
Part 2: Recover Deleted Photos from iPhone without Backup
Part 3: Extract iTunes Backup to Recover Deleted Photos from iPhone Selectively
Part 4: Recover iPhone Deleted Photos from iCloud Backup without Factory Reset
Part 1: Get Back Your Deleted iPhone Photos from Recently Deleted
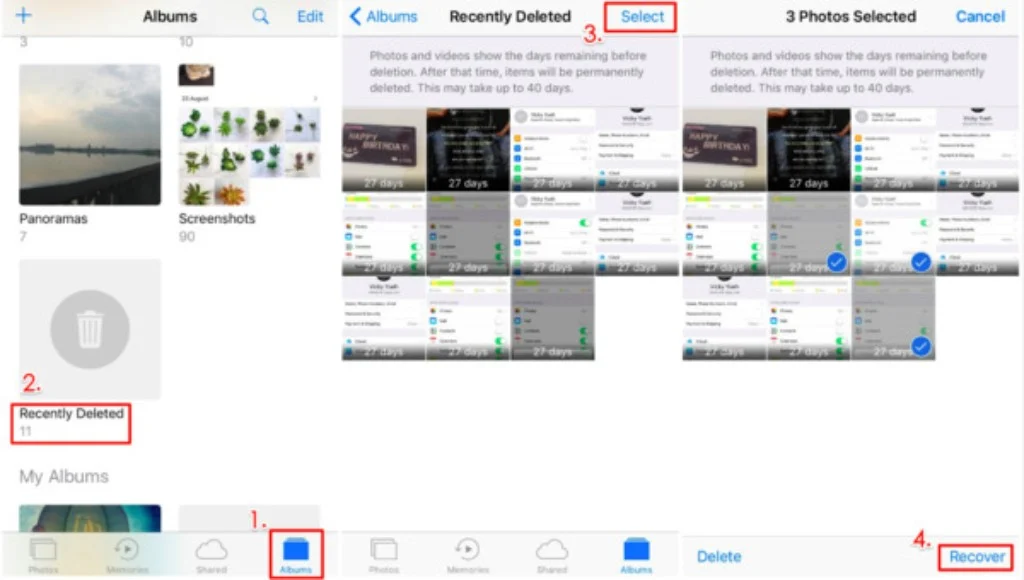
If you are running iOS 8 and later versions, you can recover deleted Camera Roll photos from the “Recently Deleted” album directly. Be aware that those deleted iPhone photos can be kept for 30 days. Once it reaches the deadline, this method does not work for you.
Step 1: Choose “Albums” from the Photos app on iPhone.
Step 2: Scroll down and tap “Recently Deleted” album.
Step 3: Preview if there are recently deleted iPhone images you need.
Step 4: Choose “Select” and mark before items you want to get back.
Step 5: Tap “Recover” to recover photos from Recently Deleted.
Part 2: Recover Deleted Photos from iPhone without Backup
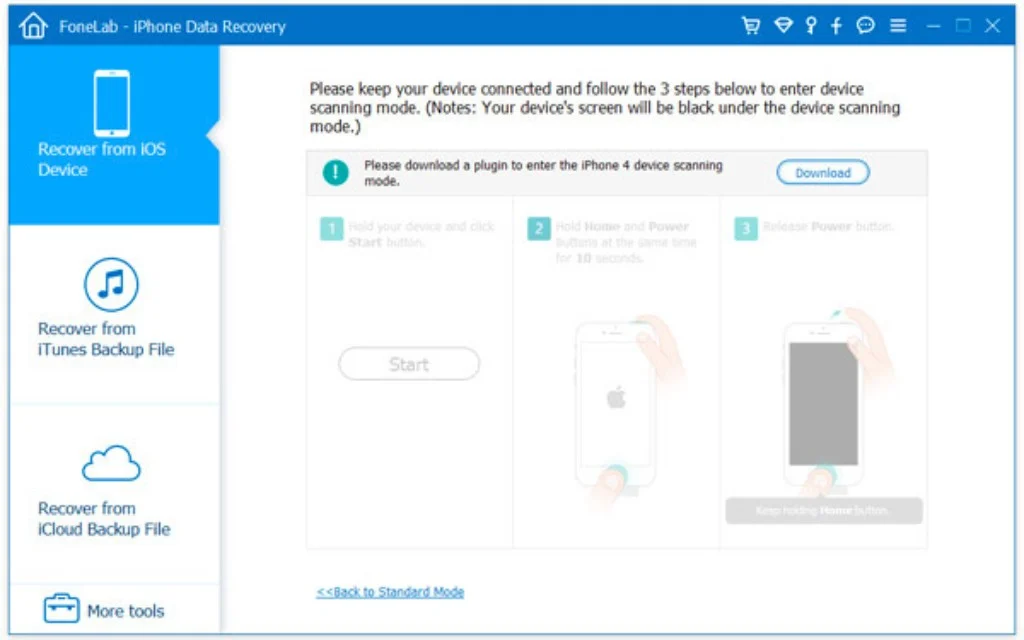
What if there is no backup file you can refer to? You can see many similar questions like “Can I recover permanently deleted photos from my iPhone”. Of course, the answer is “Yes”. You can run Aiseesoft FoneLab iPhone Data Recovery to recover any deleted or lost iOS data from iPhone directly, no backup file is required.
Step 1: Scan your iPhone
Free download and install Aiseesoft iPhone Data Recovery on your Windows or Mac computer. Then use a lightning USB cable to connect iPhone to the computer. Once your iOS device is detected, choose “Start Scan” to search the connected Apple device completely.
Step 2: Recover permanently deleted photos from iPhone
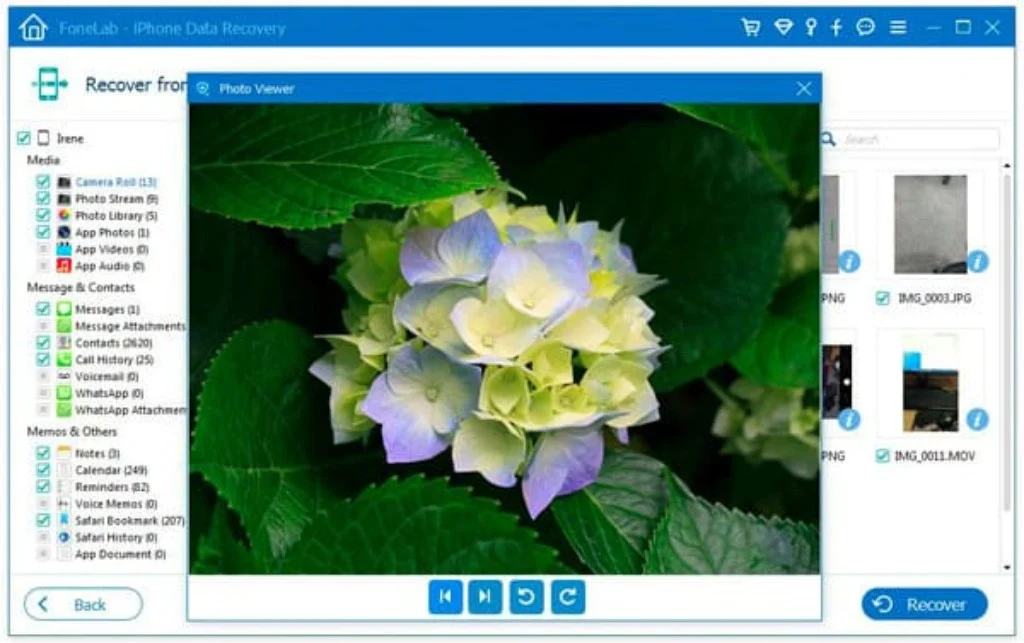
All your available files display in categories. So choose “Camera Roll”, “Photo Stream”, “Photo Library” or “App Photos” to find your target photo. You can double click a picture and then preview carefully. Choose what you want to recover. At last, click “Recover” to get the recovered iPhone photos on your computer.

Part 3: Extract iTunes Backup to Recover Deleted Photos from iPhone Selectively
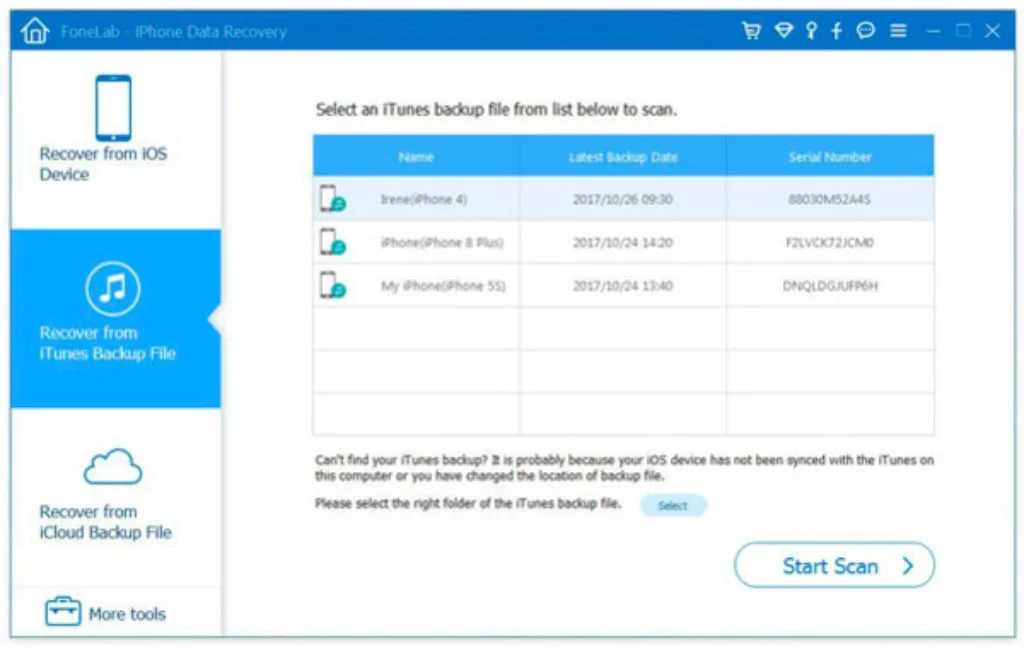
Aiseesoft iPhone Data Recovery also allows users to recover deleted photos from iPad or iPhone through iTunes backup without data loss. You can extract what you need from the iTunes backup smartly. Thus, it will not cause the further data loss damages.
Step 1: Run the iPhone photo recovery software
Launch Aiseesoft iPhone Data Recovery. Enter its “Recover from iTunes Backup File” section. You can see all your iTunes backups in the list. Select the most relevant one. Then click “Start Scan” to scan this iTunes backup file.
Step 2: Recover deleted iPhone photos from iTunes backup
After the scanning process, you can see both deleted and existing photos in the main interface. Trigger the “Only display the deleted item(s)” option to the “On” state. Consequently, you can get the deleted iPhone photos quickly. Preview and choose any picture you want to recover. Finally, click “Recover” to finish the process.
Part 4: Recover iPhone Deleted Photos from iCloud Backup without Factory Reset
There is no need to factory reset your iPhone or iPad. Actually, you can run Aiseesoft iPhone Data Recovery to selectively recover deleted photos from iPhone in a short time. It is totally safe and easy to use.
Step 1: Log into iCloud account
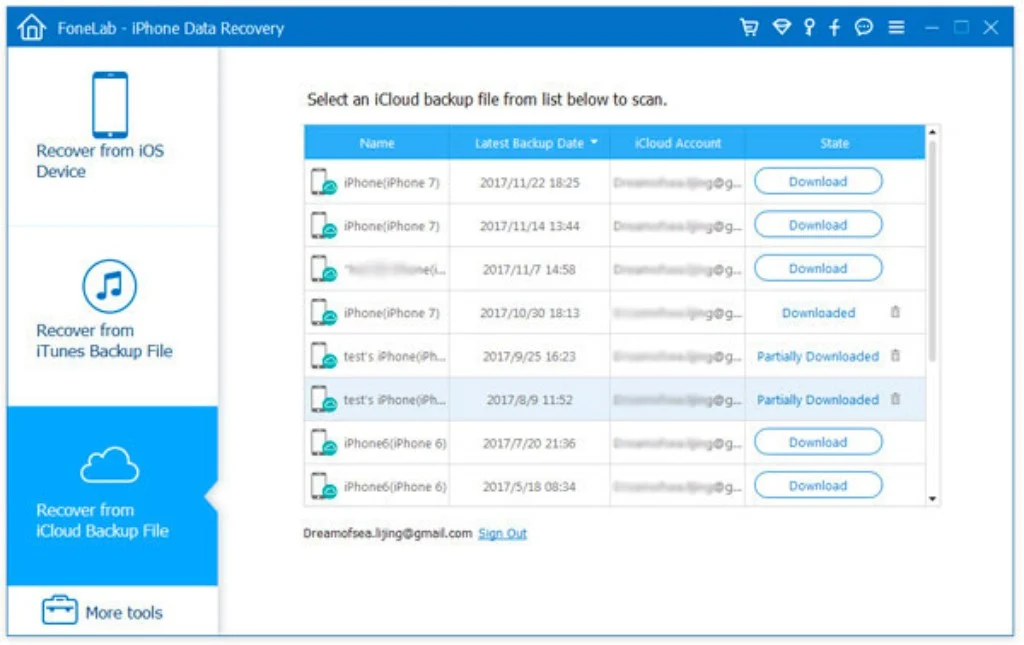
Run Aiseesoft iPhone Data Recovery. Locate the third “Recover from iCloud Backup File” section. Sign into your iCloud account with Apple ID and password. Sooner, you can see all your previous iCloud backup files.
Step 2: Choose file types to scan
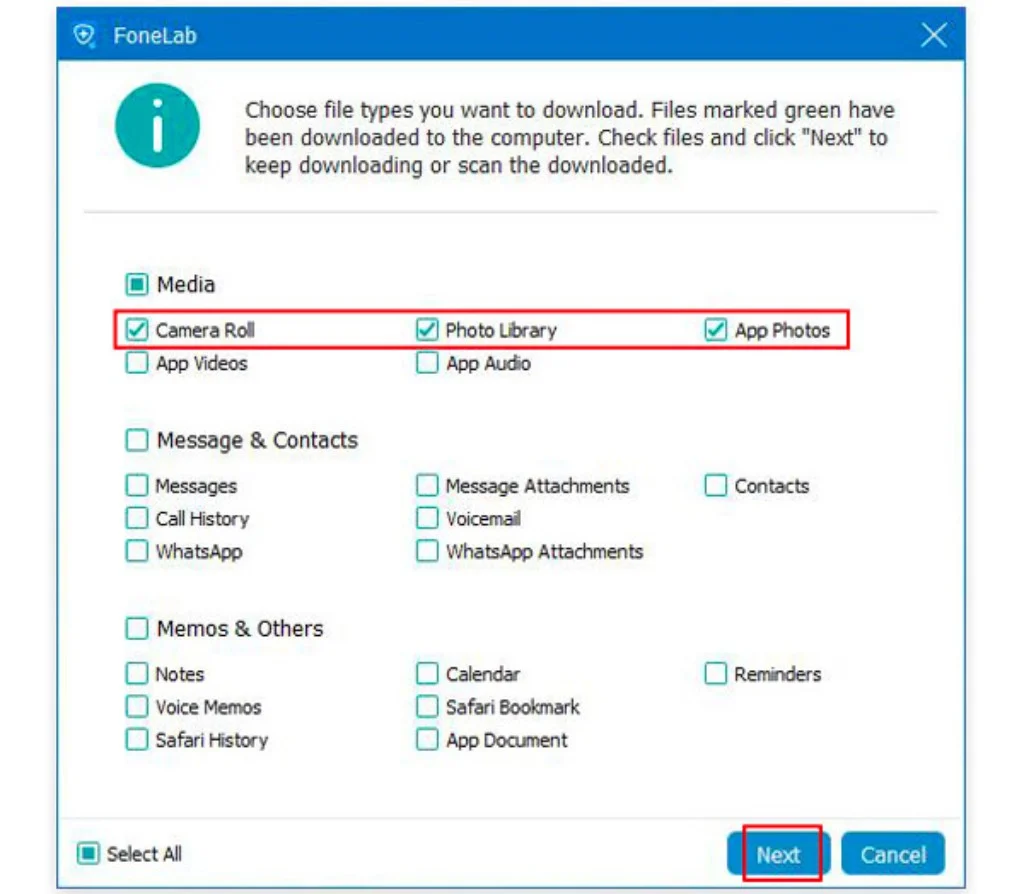
A new window pops up. During this time, you can mark before “Camera Roll”, “Photo Library” and “App Photos”. As a result, it takes less time to complete the scanning process. Later, click “Next” to move on.
Step 3: Recover deleted photos iPhone from iCloud backup
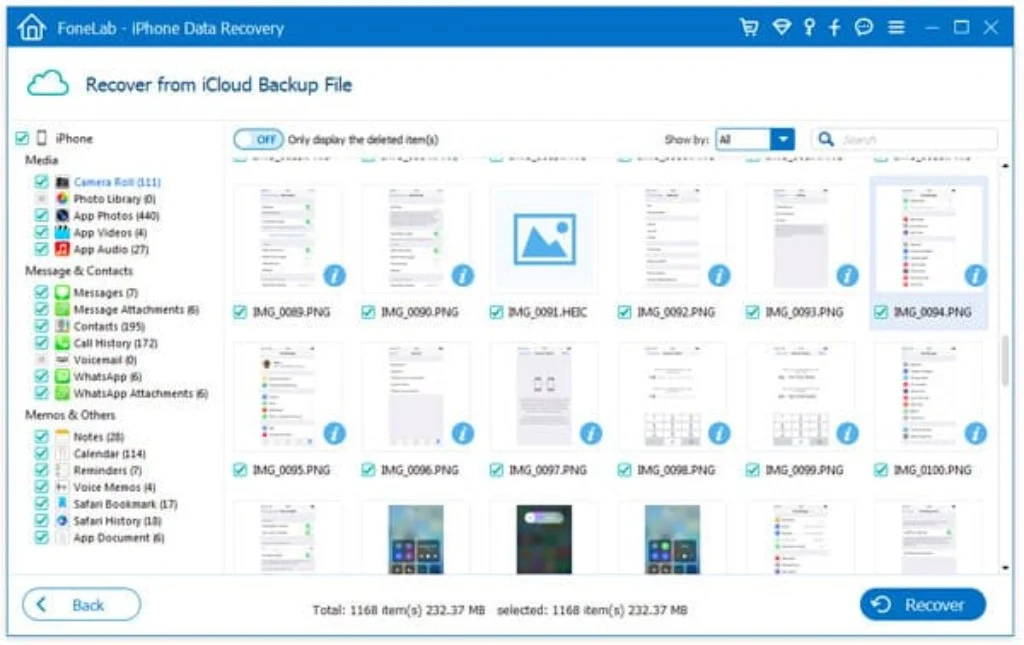
You can see all pictures displayed in the main interface. Well, it is also supported to sort out files by name, date and others. You can search the certain file to find it quickly. After selecting deleted iPhone pictures, you can click “Recover” to end the process.
That’s all for how to recover deleted photos iPhone safely and easily. If you have any good suggestion or question, please don’t hesitate to contact us.

