When you’re working on how to create designs for print, you are probably investing a lot of effort to ensure your design turns out exactly as you like. If you’re a graphic designer who has spent most of your time focused on digital design, then it helps to understand how print design is different. You’ll have to adapt for colors, fonts and more.
What is RGB and CMYK?
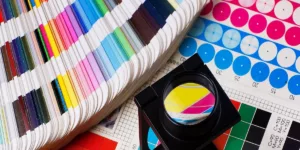
When you are printing your designs, it is critical to set your software to CMYK. With computer graphics, the RGB color system is used–it consists of green, blue and red. Although, printers work differently. With printers, you get cyan, magenta, yellow and black.
Naturally, the RGB system has a larger range of colors. This is why you have to switch to CMYK. Otherwise, your print design will come out in a color you weren’t expecting. Still, even with CMYK, you won’t always see an exact replica of what you see on the screen. As a result, it is imperative to proof your designs before making your final selection.
Choose a font
The right font can make a difference whether you are printing business cards, brochures or other marketing messages. A bad font choice may diminish your credibility. So, when choosing fonts, you must think of your brand personality. Are you traditional or more contemporary? Another item to consider is where the text will be displayed. You don’t want something too large and bold for a small space and vice-versa.
You don’t have to choose just one font, but it does work if you use a single font for your entire brand. If you want more than one, then stick with three–at the most. Nonetheless, you want your fonts to be versatile.
Test how they look in varying sizes, as well as in capitals, lowercase bold, italic and more. Make sure you like the way the fonts look. Even more important is ensuring your two or three fonts pair well. It helps if you use fonts in the same family. You can also use multiple fonts of they share letter height or width.
Consider resolution
Resolution isn’t a big issue with digital design. This is different with print design where 300 DPI is the standard setting. For printing, you will definitely need high-resolution files. The last thing you want is for your prints to look muddy and blurry.
There is nothing like spending a lot of time on your design only for it to come out completely incoherent. Yet, it also depends on the number of dots on your printer. The best practice is to set it at the maximum DPI of 300. If you go any higher, the result could end up overly saturated. Still, DPI is not the same as pixels per inch–which, is how many dots are in a square inch of screen space.
Let it bleed
Well, not in the sense you’re thinking. Printers cut paper in a way that leaves some room for error–this is called bleed. With the right design software, you can determine where the bleed will start and end. The bleed also depends on the type of printer you’re using. Varying printers require different amounts of bleed. Truly, print design is like artwork. You still have to proof the files, and determine if they are ready for distribution. It is more than just tap and go. You can check your printer settings to determine the bleed.
Scale your design
With digital design, you can quickly scale your images and colors to ensure it looks perfect on the screen. If it is going to be printed as a poster or billboard, then you will have to scale your design. As you can imagine, images will look different on a business card than they will on a billboard. For a business card, make sure the text is legible. For larger prints, your images must be at a high enough resolution to prevent blurring. On the other hand, if you use vector images, you can scale them as much as you like.
Printing designs takes a lot more work than digital productions. The reason is you must proof, scale, choose fonts and colors much more decisively. When everything is completed, your print design can have a lot of impact.