Surprisingly enough many users who try to work with DLNA for the first time usually have no idea how to use Plex Media Server, which is a general-purpose program capable of not only playing media files from almost all known devices but also providing online broadcasts using any connection type.
One of the most common tricky issues the user may face is using Plex Media Server after installation and prior configuration. Keep in mind, that proper server configuration leads to its convenient and efficient use afterwards. So, try to make a close study of this article.
Plex Media Server: First View
First, let’s figure out what Plex Media Server software pack really is.
To begin with, similar to other DLNA clients it allows you broadcasting video, audio or graphic content from a laptop or desktop computer terminal directly to a set-top box with resolution exceeding standard parameters of devices mentioned above.
Besides the program has undeniable advantages like it gathers data about the movies or audio albums played from the Internet regardless of the original signal. This is very similar to how standard ID3 tags work. Yet the latter suppose data to be initially saved, while the former deals with loading content from the world wide web, where many interesting facts other than description are available as well. But this is a different story.
In addition, such virtually-physical server can be some kind of a platform capable of connecting other devices or users for watching the most-shared content.
In other words, configuring Plex Media Server program sometimes requires only connecting new users, who have access to it, or creating general folders for watching media by multiple users at the same time. Here is when P2P technologies come into play working similar to peering networks, when seeding downloadable files to other signed in the network computers (here, on the server) takes place on a single terminal, where the full or complete file is stored. Sometimes the devices are capable of sharing data between each other when configured correspondently.
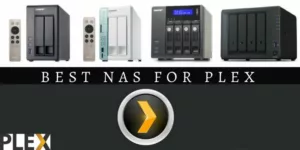
We’re not going to go into details about NAS for Plex picking criteria. PrizedReviews made it professionally enough describing and comparing the best models and creating a perfectly detailed buyer’s guide.
Plex Media Server Client Installment
That was all about theory. But the most interesting comes with practice. First, we need to download and install Plex Media Server pack. Basically, you will have no difficulties during installation. The most important thing here is to set running the executable installation file (Setup.exe) as Administrator on installed systems Windows 7 and above versions.
All the rest is quite simple. Just follow the installation program instructions like choosing location etc as you usually do. Now we’re moving to the most interesting part.
Initial Signing in
Of course, installing the pack, as a rule, doesn’t cause any difficulties, yet unfortunately, they will occur later. Hence it is better to sign in on the official website. This is also advisable for all the users, who are going to connect to this server in the future because it will be simply impossible to use the program without signing in.
So, let’s visit plex.tv official website, create an account, and follow the instructions. Actually, the procedure is not complicated, it is mostly like you used to normally do on your computer. So we’re not going to go into details in this part as the most interesting comes later.
It’s very crucial here to prevent Windows firewall from blocking the program. You can do this by creating a new instruction in advanced security settings and adding port 32400 there. Sometimes you may need this port forwarding on the router.
First Start of the Plex Media Server
The program seems to be correctly installed, and now we need to run it. You can imagine the user’s disappointment, when launching the application by double-clicking on the icon brings no results! What could be wrong?
Don’t panic, there is nothing to worry about. The fact is the application integrates its process into the background services work after setup and activates itself. You’re already using the Plex Media Server! To run or open the program you need to find the icon in the system tray (it may be hidden in systems like Windows 8 or 10. Click on the “Up” arrow to display it).
How to Use the Server Together with a TV Panel?
First of all, you need to create a library on the required terminal to use the program in combination with television panels. For example, select data type as “Movies”, click the continue button, and then set the search of folders in the correspondent search section.
If there is an active Internet connection, description found in the network will be added to all the video files. This step allows you selecting the files that are stored on your hard drive and simply adding them into your library. There is one more “tip” though: you need to share this “loot”, so that everyone else could access the content in the network. Use the button in the form of a pinion gear to do this. Here we go for now.
Now let’s talk about the panels. For example, on Samsung-modified models supporting this technology first you need to press the red button on the remote, then develop a new user with a random password. Next, enter the server IP by pressing the blue button on the remote and then type 109.91.176.102. Press the blue button again and move to the synchronization section.
Now turn the panel off and on, and then enter SmartHub again, where Plex widget appears. In case there is no widget, repeat the same procedure again. If you managed to do this, well done. After that, you can install some additional plug-ins that will help you make it easier to work with the server.
How to Use Chromecast and IMAC?
As for Chromecast, the technology is virtually the same. Yet it works better on mobile devices, which should be synchronized with high definition panels. This particularly concerns Samsung products. I find no sense in speaking about the connection in details, as it is described in any device instructions.
How to use Plex Media Server on IMAC? Actually, connection to Apple computers or rather connecting these devices to others is all about using Mac OS X instead of Windows.
The procedure is basically the same as described above.
Advantages and Drawbacks
According to PrizedReviews.com website the main problem and at the same time the biggest advantage is that unregistered on the official resource users will not be able to connect to the server even if they have the official version of installed Plex Media Server client.
So, how to use it? Just sign in and get access to it. Simple as that.
Conclusion
Of course, the question of using Plex Media Server doesn’t come to the provided recommendations only. Those are some general ideas. When you run the application, there is a plenty of settings to be adjusted as required depending on your needs. For example, add serials into a single folder of the same name or create your own musical collection.
Considering all this, even using initial default settings and adding files or folders into specific sections regarding gathering information from the Internet you can have automatic systematization or cataloging any multimedia content, no matter if it is stored on your computer or in the Internet.