I still remember the moment I opened the box of my first Mac. I was so excited that I couldn’t wait for the morning. Instead, I opened the box immediately after the courier service delivered it to me in the middle of the night. Formerly, I had only used the Windows operating system (OS) and was very familiar with this platform. I could confidently say “I can do a lot of things with a Windows PC”. However, I had never used a Mac computer before, and had only spent a few hours at the Apple Store to look around and test a few Macs. I thought that with my previous computing experience, using a Mac can’t be that difficult. After turning my new Mac on and setting up a new account, I was stuck. I didn’t know how to install a new app in Mac OS X. I found myself on Google looking for answers to this question: How to install a new application on my Mac? For users who have used Mac OS X for a while, installing or uninstalling an app is very familiar. But for a beginner, it could be somewhat confusing. Therefore, I have created a list of 7 basic tips and tricks that beginners should know to get started with their new Mac computers.
#1 – Install and Uninstall Mac Application
Installing an app in Mac OS X is a little bit confusing for starters. It is nothing like what you do in Windows OS. In most cases, you have to drag the application and then drop it into the /Applications/ directory. For example, to install the Firefox browser, the installation process would be: Download Firefox browser as a .dmg file from Mozilla’s website. Open the .dmg file and extract it. Click on the installation file and then drag the Firefox icon into the /Applications/ directory. Delete the Firefox .dmg file.
That’s it!
In fact, the .dmg file works a lot like a compressed file. When you download the .dmg file, you have to extract it to show the application, which you will use to drag and drop into the /Applications/ folder. It also works like an external drive, which mounts itself into your Mac and allows you access it like an external USB flash drive. It even adds itself to the left sidebar that next to internal drives. Once installed, you can eject the mounted .dmg file like you would do with a USB flash drive. Just right-click on it and then select “Eject”.
Notes: When you download an application from Apple’s Mac App Store, it will automatically install. You do not need to drag and drop it to the /Applications/ directory. The application with the .app extension does not need to be installed. It looks like a portable program in Windows OS, which you only need to open and use. However, I still recommend you move it into the /Applications/ directory. Otherwise, it will not be included in the Launchpad. Several applications use the setup wizard to install into your Mac computer. Hence, you can’t just drag and drop them. You actually do not need to drag apps to the /Applications/ directory. Instead, you can drag and drop them into any folders you want. There is nothing different, except it will not be included in the Launchpad.
Uninstall Mac Applications
Uninstalling an application in Mac OS X is really simple. You only need to move your application to the Trash and then it’s gone! See, so simple! However, for applications that have been installed through the setup wizard, you will need to uninstall it through the uninstall wizard.
Also, moving apps to the Trash to uninstall will leave behind some settings and minor files. If you want to remove these files completely, try the AppCleaner.
#2 – Close Crashed or Unresponsive Applications
It does not occur often, but sometimes apps just freeze or even crash. If you are encountering this situation, just press and hold the Options key on your keyboard and then right-click on the crashed app in the bottom dock and choose “Force Quit”. It will be closed immediately.
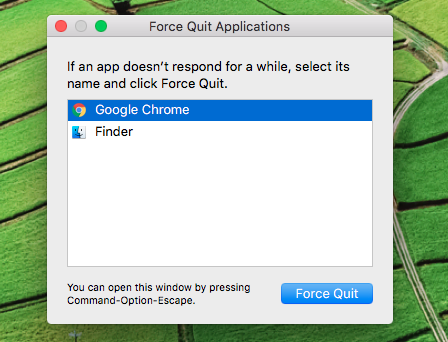
Also, you can use “Force Quit Applications” to force frozen or crashed apps to close in the Mac. This method is quite similar to the Ctrl + Alt + Del feature in Windows OS. To bring up this feature, press Command + Options + Esc, and then select the app you need to close and click on the “Force Quit” button.
#3 – The “fn” Key
If I had to describe the “fn” key in one word, I would say “Awesome”. It is a useful key, and you should use it more frequently. The “fn” key is a part of Mac keyboard shortcuts, which allows you use your Mac quicker and more efficiently. For example, you can press fn + Delete to remove the right character instead of the left one. Also, you can use fn + Control + F2 to navigate to the top menu bar without a mouse. And of course, there are many more keyboard shortcuts you can use, read more here.
#4 – Enable Right-Click on the Trackpad or Magic Mouse
Have you ever thought about how you can use a computer without the right-click context menu? By default, the right-click feature is disabled in Mac OS X. If you want to use it, go to System Preferences and then click on the Mouse option. In the next step, choose the “Point & Click” tab and then enable “Secondary click”.
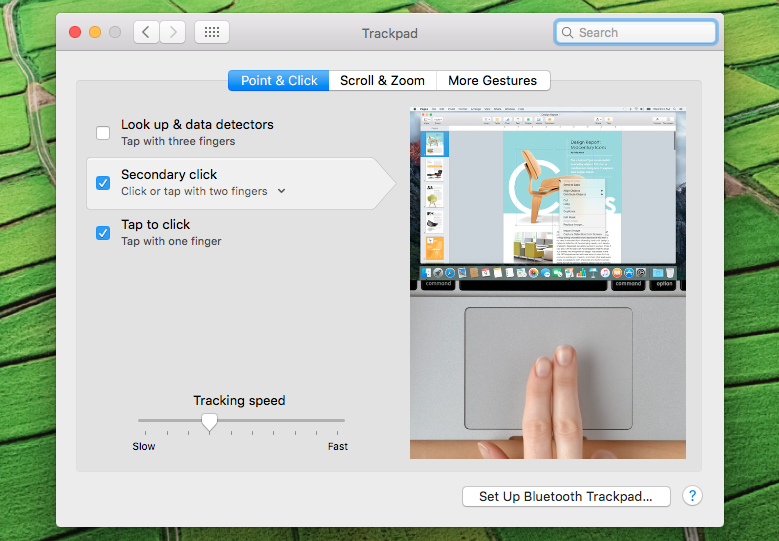
Similarly, go to System Preferences > Trackpad > select the “Point & Click” tab and then enable “Secondary click” for the trackpad. After that, you can press and hold the Control key while clicking, and the right-click context menu will show up.
#5 – Manage Login Items
When you have installed new apps, they may sometimes add themselves to run automatically every time you boot up your Mac. If there are too many items to load up, your Mac will take longer to startup.
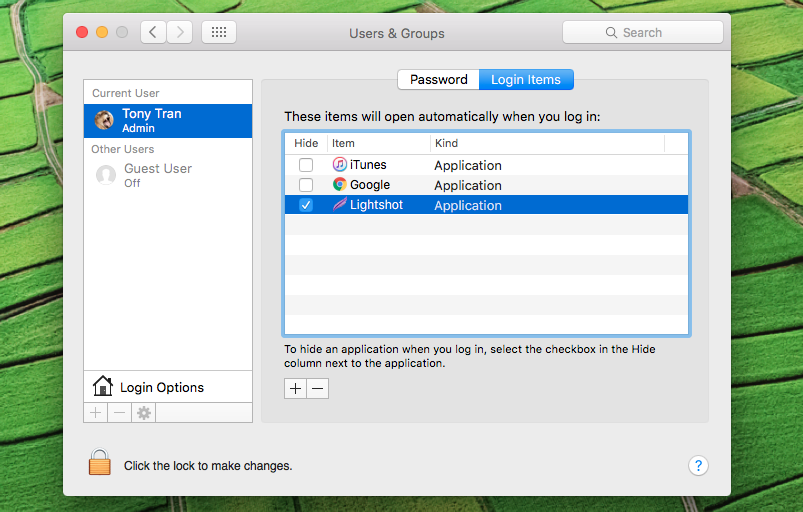
Like in Windows OS, you can easily enable or disable any items that you don’t want to run with the startup process. To do so, go to System Preferences > Users & Groups. In the next step, choose the “Login Items” tab and select the item you want to disable, and then just click the “-” button. It will immediately be removed from the startup list. Also, you can add a new app to run with the startup process by clicking on the “+” button. Then select the application you want and click on the “Add” button.
#6. Capture Screenshots
How do you take screenshots on Windows PC? You press the PrtScr key to take a screenshot and save it to Windows’s clipboard. Then you use Microsoft Paint to convert the screenshot from the clipboard into a picture file, right? But did you know how to take a screenshot on your Mac? Indeed, it’s more simple than what you did on your Windows computer.
To take a screenshot of the entire screen of your Mac computer, you can use Command + Shift + 3. Just press these keys at the same time and your Mac will automatically take a screenshot and save it to your desktop screen, by default. If you want to take a screenshot of a specific area, just use Command + Shift + 4. After pressing these keys, your Mac cursor will automatically turn into the cross-hair icon. After that, you can press and hold down your mouse or trackpad, and then move it and choose the area you want to take the screenshot of. After releasing your mouse or trackpad, the screenshot will be taken automatically and saved to your desktop screen.
#7 – Find more information about your Mac
You can easily find more information about your Mac by clicking on the Apple logo at the top-left of your screen and then select “About This Mac”. These are basic details, such as model name, processor, memory, graphics card, serial number and storage.
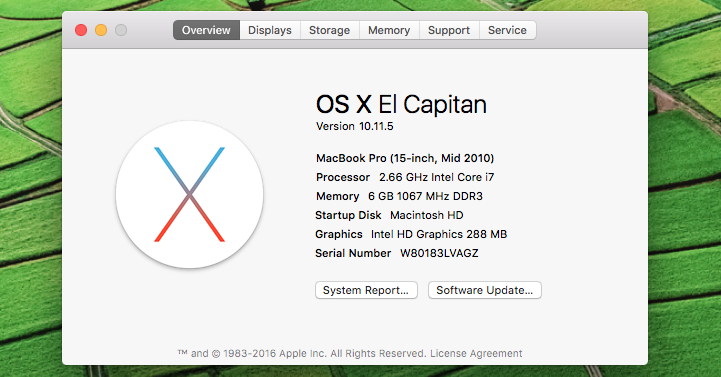
If you want to view more detailed information, use the System Information app that you can find in Applications > Utilities. This app will help you to view all necessary information about your Mac, including model name, processor name, how many processor cores your computer has, how much memory you have and so much more. I can say that you can find any details about your Mac here.
Do you have something to add to this story? Share it in the comments.

